Saturday, January 14, 2012

crossBuild ARM target binaries on ARM host

... building STM32F10x (ARM Cortex-M3) sources on WM8505 (ARM9) host.


The Debian installation on my WM8505-based tablet already includes "build-essential" package (gcc, binutils, make, etc.) but, unfortunately, no "multilib" package available yet for debian armel =( . So I have to built my own bare-metal toolchain using croostool-ng. Using this config file, I was able to built this toolchain arm-none-eabi-4.6-armv5.tar.gz (just extract this archive to install). It took almost 20 hrs to finish on WM8505 ( at 300MHz with 128MB RAM ).


For testing the toolchain, I have chosen this STM32F103RB FreeRTOS demo (4 tasks example) sources since it requires "newlib" functions to build completely.

# export CROSS_COMPILE=/path/to/arm-none-eabi/bin/arm-none-eabi-
# make -s clean all
# make program

Also, STM32Loader also works properly on my host machine since it already has python-serial installed. Using "/dev/ttyWMT0" serial port* to transfer the binary using STM32's uart bootloader:

   * USB-to-Serial adapters (e.g. FT232 and PL2303 based) will also work.

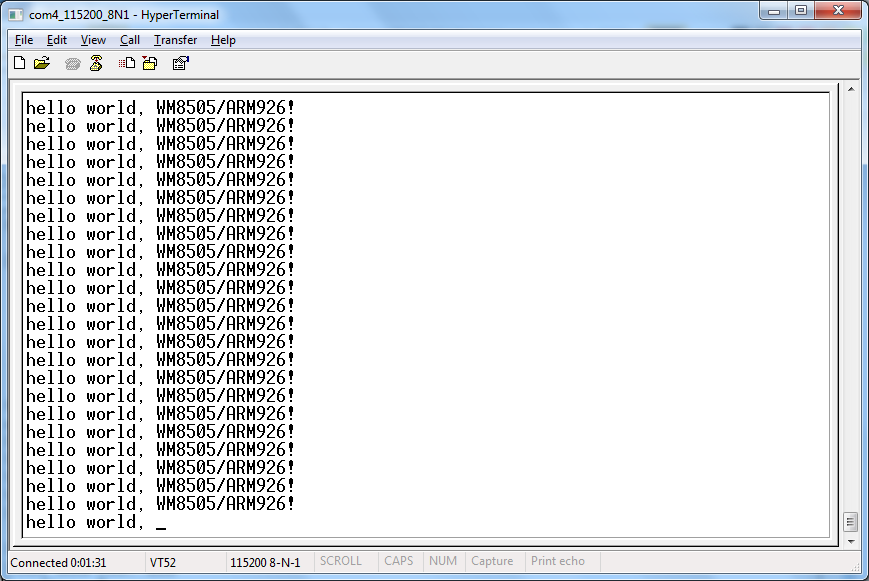
For serial-port monitor, I'm using "minicom" already installed on my Debian. Below is the expected result of the STM32 FreeRTOS demo:


Friday, January 13, 2012

Debian Wheezy on WM8505


Installing Debian-Wheezy on microSD card is just simply extracting the two gzip archives into two separate partitions (see below).

$ sudo tar xzpvf wm8505-debian-wheezy-lxde.tar.gz -C /media/extpart/ ; sync
$ sudo tar xzpvf wm8505-kernel-3.0-fatpart.tar.gz -C /media/fatpart/ ; sync


At least 1GB card is needed for the installation, 2GB recommended. The first partition should be a FAT32 (or FAT16) where the "script" folder, containing the "scriptcmd" and "uImage" (linux kernel image) files, is located.The second partition should be an ext2 (or ext4) partition where the root file system will be extracted. Visit these sites for more references: projectgus.com, devio.us , cheap-hack.com.


username: root
password: root

* initial installation using debootstrap
* with minimal LXDE, dillo, build-essential, python, minicom, etc.

* wi-fi / ethernet working ; touchscreen NOT working

######################################################


side note:

Recovering "wload" and "u-boot"  without a flash programmer.
However, this procedure needs an already working SPI Flash chip.
( I got mine from another unit. )

I soldered them both in a piggy-back connection, except for their #CS pins (pin 1 = chip select). I also soldered a wire on the pin-1 pad on the board and covered it with a kapton tape as an insulation. The other end of the wire is initially connected to the #CS pin of the working chip. The working chip will be only needed for the first boot until we got to u-boot console prompt (needs serial/uart connector).

After getting to the console(i.e press Enter key on the serial console while booting), transfer the #CS wire to the chip that needs to be reprogrammed (use SPDT switch, if needed).
Then, execute these commands (assuming that "wload.bin" and "u-boot.bin" binaries are already saved in the FAT partition of the SD card)

mmcinit

fatload mmc 0 0 wload.bin
erase ffff0000 +10000
cp.b 0 ffff0000 10000

fatload mmc 0 0 u-boot.bin
erase fff80000 +50000
cp.b 0 fff80000 50000

...  here's the serial log for this process.


Saturday, July 23, 2011

Quadruped


My first prototype of a four-legged robot.
12 servo motors controlled by STM32F103RB (MiniSTM32 board).


It was previously a "tripod" =) . But then, later, another leg was added (3 servos per leg) for easy balancing even without using IMU sensors.


         * PhilRobotics @ MOA July 17, 2011 (pics by vic)


Sunday, April 3, 2011

WM8505 LCD driver

Another low-level hack on my Android Apad ( clone/fake Apad? ).

This time it's now with the 800x480 GLCD driver. It's working, but I'm not sure if the initialization is complete (i.e. the hardware is, most probably, already initialized by the bootloader). I've just modified the sources from Wondermedia (look at "\common\wmt_logo\" folder). LCD routines here are not using the graphics engine (GE) of WM8505.

download Eclipse project here:  ARM9_WM8505_LCD.zip

Read my previous post on how to set-up the tool-chain and how to load the program on WM8505.

    expected output:

forum link: Re: Let's learn ARM using cheap 7" tablets

Tuesday, March 29, 2011

Hello World, WM8505!

 My first step in learning the ARM9 platform.

VIA / WonderMedia's WM8505 (ARM926EJ-S):


UART0 Connection:

Serial console connection details:  Project Gus

Required Tools:  all are free =) 


The goal is to run this simple code: (main.c)

 It should output these strings on UART_0 port, just like this:


 After setting up the tools, here are the next steps:
-Create new project on Eclipse

 -Select target processor (WM8505 is a ARM926EJ-S processor)

-Select binary format for the flash image:

-linker setting:

 - after building the project, open the generated *.map file to verify the linker output
    *I don't know, yet, what's with this 0x03F80000 address.
      This is the load address used by Wondermedia version of U-BOOT

- Complete Eclipse project files:
download here: ARM9_WM8505_UART0.zip

* most of the hardware initializations (e.g. clock settings) are already done by the bootloader,
   so we don't have to worry about them for now.

Next question is, "how to load and run the code?
I've tested two ways of how to transfer the generated image to the RAM:
First is through tftp transfer, second is SD card load during boot-up.
Both method uses the bootloader, which is already present in the board (in the SPI flash).
My board got v1.1.4 of U-BOOT.

1. TFTP transfer to RAM.
- get a copy of this freeTFTPD32 server application.
- using the LAN adapter, connect board to host PC Ethernet
enter u-boot console, and type these commands:

* RAM load address can use other than 0x0

2. SD card scriptcmd
-guide:  How to edit "scriptcmd"
-during boot-up, the u-boot will read the "scriptcmd" script in the "script" folder of the SD card.

*these commands can also be typed in the uboot console. ("mmcinit" must be sent first)

references:
Wondermedia GPL sources
WM8505 datasheets
forum link:
Let's learn ARM using cheap 7" tablets

Thursday, February 3, 2011

MARG sensors + Bluetooth

MARG (Magnetic, Angular Rate, and Gravity) sensor array used for AHRS (Attitude and Heading Reference Systems).


Android OpenGL 3D display on Samsung Spica (i5700).


Sparkfun 9DOF sensor stick SEN-10389, later replaced by SEN-10321.

Using ATmega328P, operated at 3.3V supply and 8MHz crystal. At this speed, reading sensors' measurements and computing "AHRSupdate" take about 31ms to complete. Default compiler setting is used on WinAVR. With 25Hz sampling rate, this leaves mega328p extra 9ms to do other tasks. Bluetooth SPP (serial) communication is buffered and interrupt driven, so no processing time is wasted in reading and sending data to the android phone.


References:
(1) Sebastian Madgwick's Alternative AHRS (MARG) algorithm - Quaternion implementation of Mayhony's DCM filter incorporating magnetic distortion compensation.
(2) Fabio Varesano's FreeIMU. Also using Madgwick's implementation of the DCM filter on Arduino platform.
(3) Rotation convertions by Martin Baker. Very good discussion on quaternions and other 3D representation like Euler angles and transformation matrix.
(4) OpenGL Transformation Matrix by Song Ho Ahn
(5) Similar discusion on diydrones.com started by Harinath

Android project examples:
Android Bluetooth
Bluetooth Chat
Android OpenGL Projects
OpenGL ES tutorial
Android Bluetooth Oscilloscope

Special thanks to the generous guy who gave me these toys, Thank you very much!


Wednesday, January 19, 2011