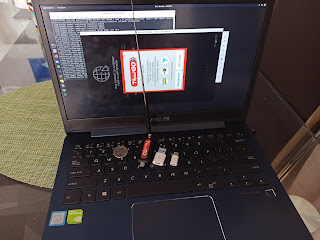
As of this writing, the TVplus Go dongle only works on Android operating system. So the way to make it work on an x86 platform is either install the Android-x86 or simply use an Android emulator. This demo will use the official emulator running on Ubuntu 18.04 64-bit host OS. Other OS types, like Windows 10, might also work but will still initially require *nix-based tools for modifying the virtual device's ramdisk cpio archive and system ext4 image file.
The TVplus Go Android app, as of version 1.0.28, only works on ARM CPUs (armeabi-v7a and arm64-v8a only). Running the ARM emulator is not advisable because it's too slow and unusable. So the only option now is to install libhoudini (ARM translator) on the x86 emulator.

Guide:
1. Download the Android command line tools (installing the whole Android studio is only optional).
https://developer.android.com/studio, e.g. extract sdk-tools-linux-4333796.zip to ~/android/sdk.
2. Open a terminal, change directory to ~/android/sdk, and set the following environment variables:
$ export JAVA_OPTS='-XX:+IgnoreUnrecognizedVMOptions --add-modules java.se.ee'
$ export ANDROID_HOME=$HOME/android/sdk
$ export ANDROID_SDK_ROOT=$ANDROID_HOME
3. Download the emulator, platform-tools, and the system-image. Android Nougat (API-25) is selected because easier to modify compared to with the recent versions.
$ ./tools/bin/sdkmanager "platform-tools" "platforms;android-25" "emulator"
$ ./tools/bin/sdkmanager --install "system-images;android-25;google_apis;x86_64"

4. Go to $ANDROID_SDK_ROOT/system-images/android-25/google_apis/x86_64 and increase the size of the system.img (create a backup first!). Allocate at least 128MB for the additional files.
$ cd $ANDROID_SDK_ROOT/system-images/android-25/google_apis/x86_64
$ dd if=/dev/zero bs=1M count=512 >> ./system.img
$ e2fsck -f system.img
$ resize2fs system.img

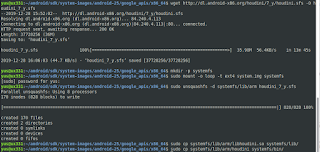
5. Copy libhoudini binaries. Mount first the system.img before extracting the files.
$ wget http://dl.android-x86.org/houdini/7_y/houdini.sfs -O houdini_7_y.sfs
$ mkdir -p systemfs
$ sudo mount -o loop -t ext4 system.img systemfs
$ sudo unsquashfs -d systemfs/lib/arm houdini_7_y.sfs
$ sudo cp systemfs/lib/arm/libhoudini.so systemfs/lib/
$ sudo cp systemfs/lib/arm/houdini systemfs/bin/

Either set the selinux to permissive (add -selinux permissive option on the emulator) or set the security context of the libhoudini files.
$ sudo setfattr -n security.selinux -v u:object_r:system_file:s0 systemfs/bin/houdini
$ sudo setfattr -n security.selinux -v u:object_r:system_file:s0 systemfs/lib/libhoudini.so
$ sudo setfattr -n security.selinux -v u:object_r:system_file:s0 systemfs/lib/arm
$ sudo setfattr -n security.selinux -v u:object_r:system_file:s0 systemfs/lib/arm/*
$ sudo setfattr -n security.selinux -v u:object_r:system_file:s0 systemfs/lib/arm/nb/*
6. Allows ARM executable file formats
$ sudo mkdir -p systemfs/etc/binfmt_misc
$ echo ":arm_dyn:M::\x7f\x45\x4c\x46\x01\x01\x01\x00\x00\x00\x00\x00\x00\x00\x00\x00\x03\x00\x28::/system/bin/houdini:" | sudo tee systemfs/etc/binfmt_misc/arm_dyn
$ echo ":arm_exe:M::\x7f\x45\x4c\x46\x01\x01\x01\x00\x00\x00\x00\x00\x00\x00\x00\x00\x02\x00\x28::/system/bin/houdini:" | sudo tee systemfs/etc/binfmt_misc/arm_exe

$ sudo nano systemfs/build.prop
add the following properties to the build.prop (overwrite if existing):
ro.enable.native.bridge.exec=1

ro.product.cpu.abilist=x86_64,x86,armeabi-v7a,armeabi
ro.product.cpu.abilist32=x86,armeabi-v7a,armeabi
7. Enable access to the TVPlus Go USB dongle (vendor id 0x048d, product id 0x9308)
$ echo '<permissions><feature name="android.hardware.usb.host"/></permissions>' | sudo tee systemfs/etc/permissions/android.hardware.usb.host.xml
$ echo 'SUBSYSTEM=="usb", ATTRS{idVendor}=="048d", ATTRS{idProduct}=="9308", GROUP="kvm"' | sudo tee /etc/udev/rules.d/89-usb-android.rules
$ sudo udevadm control --reload-rules
8. Hide from "root-detection" and "running-on-emulator-detection"
i. rename the su executable
$ sudo mv systemfs/xbin/su systemfs/xbin/_s_uii.
iii. (optional) Install Google Play, if you want to watch the encrypted channels - need to pay P20 for the registration (in-app purchase). Copy "Phonesky.apk" from opengapps.org to systemfs/priv-app/Phonesky
iv. finally, unmount the image.
$ sync
$ sudo umount systemfs
9. Extract ramdisk, and edit default.prop
$ mkdir -p ramdiskfs
$ cd ramdiskfs
$ gzip -dc ../ramdisk.img | cpio -i

$ nano default.prop
Replace ro.dalvik.vm.native.bridge=0 with ro.dalvik.vm.native.bridge=libhoudini.so
10. Edit an init configuration file (e.g. init.ranchu.rc) to register the libhoudini by adding these lines:
# Enable native bridge for target executables
on early-init
    mount binfmt_misc binfmt_misc /proc/sys/fs/binfmt_misc

on property:ro.enable.native.bridge.exec=1
    copy /system/etc/binfmt_misc/arm_exe /proc/sys/fs/binfmt_misc/register
    copy /system/etc/binfmt_misc/arm_dyn /proc/sys/fs/binfmt_misc/register
11. Repack the new ramdisk
$ cd ..
$ wget https://github.com/xiaolu/mkbootimg_tools/raw/master/mkbootfs
$ chmod +x mkbootfs
$ ./mkbootfs ./ramdiskfs | gzip > ramdisk.img
12. Create the AVD named "avd_7_1_x86_64" based on "Android TV (720p)" device.
$ ./tools/bin/avdmanager --verbose create avd --force --name "avd_7_1_x86_64" --device "tv_720p" \
  --package "system-images;android-25;google_apis;x86_64" --tag "google_apis" --abi "x86_64"

13. Now launch the emulator.
$ ./tools/emulator @avd_7_1_x86_64 -show-kernel -verbose -memory 2048 \
  -qemu -usb -device usb-host,vendorid=0x048d,productid=0x9308
14. Install the TVplus Go Android app, either via the Google Play or via adb install
$ adb install ../apks/TVplus\ GO_v1.0.28_apkpure.com.apk
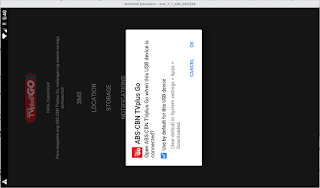
15. Finally, plugin the TVplus Go dongle to a USB port and then launch now the app on the emulator


