Sunday, April 22, 2012

Android-OpenCV Object-Tracking


Tracking a ping-pong ball using Android-OpenCV Library


source code:
svn co http://yus-repo.googlecode.com/svn/trunk/Android/apps/objtrack
* needs Android-NDK to build.
modify objtrack.cpp to detect other objects/colors


pre-built installer: Object-Track.apk
* only for Android phones with ARMv7-capable CPU and Gingerbread OS.

references:
OpenCV for Android (see Tutorial 2 Advanced - 1. Add Native OpenCV)
Tracking colored objects in OpenCV
Android-OpenCV Google-Group

##############################################
edit 05-05-12
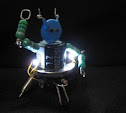
interfacing the app to philrobokit-Anito board (observe the LEDs+buzzer states with respect to the ball position).

* Data are being transmitted via the usb2serial adapter (built-in to the kit) using android-serialport-api.

Saturday, February 18, 2012

Quadruped - part 2

    my second prototype of a four-legged robot...
It is the same assembly with the previous. But this time, it's now powered by LPCXpresso (LPC1114) running CoOS. It's also controllable by bluetooth joystick.


source code (with all the revisions):
svn co http://yus-repo.googlecode.com/svn/trunk/Bots/quad_lpc1114

* source code can be build using Sourcery CodeBench Lite for ARM-EABI
* I'm using  lpc21isp to load the binaries for the lpc1114 using built-in serial bootloader.
* demo video is on my previous post.


Wednesday, February 15, 2012

Bluetooth Joystick


Android Bluetooth Dual-Joystick Controller

Sends 5 bytes every 200ms (or every 3 sec if idle).
data format: [ STX : radiusL : angleL : radiusR : angleR ]
where: STX = 0x55
           radius = {0..10}
           angle = {0..35} (or actual/10)

sample:

will send [ 0x55 : 0x0A : 0x12 : 0x05 : 0x09 ]
(**left-joystick is pulled backward; right-joystick leaning to the left)

Source code:
svn co https://yus-repo.googlecode.com/svn/trunk/Android/apps/btjoystick

Installer: BTJoystick.apk .

Joystick widget from Mobile-Anarchy.


demo on my quadruped:


#---------------------------------
edit 10/15/12
version 2: BTJoystick.v2.apk   45.8 KB


modifications:
* preference menu (e.g. "Menu->Connect" & "Menu->Options" )
* add four customizable buttons (send either an ascii char or a string)
* immediately send joystick data when a joystick returns to center position
* selectable data format, intervals and timeout
* prevent accidental closing


Saturday, January 14, 2012

crossBuild ARM target binaries on ARM host

... building STM32F10x (ARM Cortex-M3) sources on WM8505 (ARM9) host.


The Debian installation on my WM8505-based tablet already includes "build-essential" package (gcc, binutils, make, etc.) but, unfortunately, no "multilib" package available yet for debian armel =( . So I have to built my own bare-metal toolchain using croostool-ng. Using this config file, I was able to built this toolchain arm-none-eabi-4.6-armv5.tar.gz (just extract this archive to install). It took almost 20 hrs to finish on WM8505 ( at 300MHz with 128MB RAM ).


For testing the toolchain, I have chosen this STM32F103RB FreeRTOS demo (4 tasks example) sources since it requires "newlib" functions to build completely.

# export CROSS_COMPILE=/path/to/arm-none-eabi/bin/arm-none-eabi-
# make -s clean all
# make program

Also, STM32Loader also works properly on my host machine since it already has python-serial installed. Using "/dev/ttyWMT0" serial port* to transfer the binary using STM32's uart bootloader:

   * USB-to-Serial adapters (e.g. FT232 and PL2303 based) will also work.

For serial-port monitor, I'm using "minicom" already installed on my Debian. Below is the expected result of the STM32 FreeRTOS demo:


Friday, January 13, 2012

Debian Wheezy on WM8505


Installing Debian-Wheezy on microSD card is just simply extracting the two gzip archives into two separate partitions (see below).

$ sudo tar xzpvf wm8505-debian-wheezy-lxde.tar.gz -C /media/extpart/ ; sync
$ sudo tar xzpvf wm8505-kernel-3.0-fatpart.tar.gz -C /media/fatpart/ ; sync


At least 1GB card is needed for the installation, 2GB recommended. The first partition should be a FAT32 (or FAT16) where the "script" folder, containing the "scriptcmd" and "uImage" (linux kernel image) files, is located.The second partition should be an ext2 (or ext4) partition where the root file system will be extracted. Visit these sites for more references: projectgus.com, devio.us , cheap-hack.com.


username: root
password: root

* initial installation using debootstrap
* with minimal LXDE, dillo, build-essential, python, minicom, etc.

* wi-fi / ethernet working ; touchscreen NOT working

######################################################


side note:

Recovering "wload" and "u-boot"  without a flash programmer.
However, this procedure needs an already working SPI Flash chip.
( I got mine from another unit. )

I soldered them both in a piggy-back connection, except for their #CS pins (pin 1 = chip select). I also soldered a wire on the pin-1 pad on the board and covered it with a kapton tape as an insulation. The other end of the wire is initially connected to the #CS pin of the working chip. The working chip will be only needed for the first boot until we got to u-boot console prompt (needs serial/uart connector).

After getting to the console(i.e press Enter key on the serial console while booting), transfer the #CS wire to the chip that needs to be reprogrammed (use SPDT switch, if needed).
Then, execute these commands (assuming that "wload.bin" and "u-boot.bin" binaries are already saved in the FAT partition of the SD card)

mmcinit

fatload mmc 0 0 wload.bin
erase ffff0000 +10000
cp.b 0 ffff0000 10000

fatload mmc 0 0 u-boot.bin
erase fff80000 +50000
cp.b 0 fff80000 50000

...  here's the serial log for this process.